Have you recently acquired a miter saw – but don’t yet know what to do with it? You’ll be glad to know that it can come in handy in your DIY and pro projects. If you learn how to use a miter saw properly, you can achieve different cuts with impressive precision.

A power saw that can make accurate 90-degree crosscuts and angled miter cuts; a miter saw is a helpful tool. It can be used by hobbyists and professionals thanks to its accuracy, stability, and safety. Some of them have additional features for specialized cuts.
Today we will tell you all about miter saws and how to use and maintain the tool. So keep reading!
What is a Miter Saw?
Miter saws also referred to as drop saws or abrasive cut saws, are portable tools that can perform crosscuts and miter or angled cuts. Some advanced miter saws are also capable of performing bevel cuts. They are like circular saws mounted on stands with handles.
A miter saw is a stationary tool that uses a blade of 8 “-12” thickness. You have to lower the blade to the workpiece to make the desired cut. Instead of running the blade along the workpiece, the material is fed to the tool. The rotating blade slices it.
The miter saw can perform 90-degree cuts. It can also make angled cuts of 0-45-degree angles. While this tool is excellent for beginners and amateurs, the best miter saws are engineered with advanced features to enhance efficiency at a professional level.
Types of Miter Saw
Miter saws are of three types, and you can choose one based on your project. But first, you must know that miter saws may be corded or cordless. While the corded ones can be used for an unlimited duration without the need for recharging, cordless saws can be used outside.
The three types of miter saws are as follows.
Standard Miter Saw
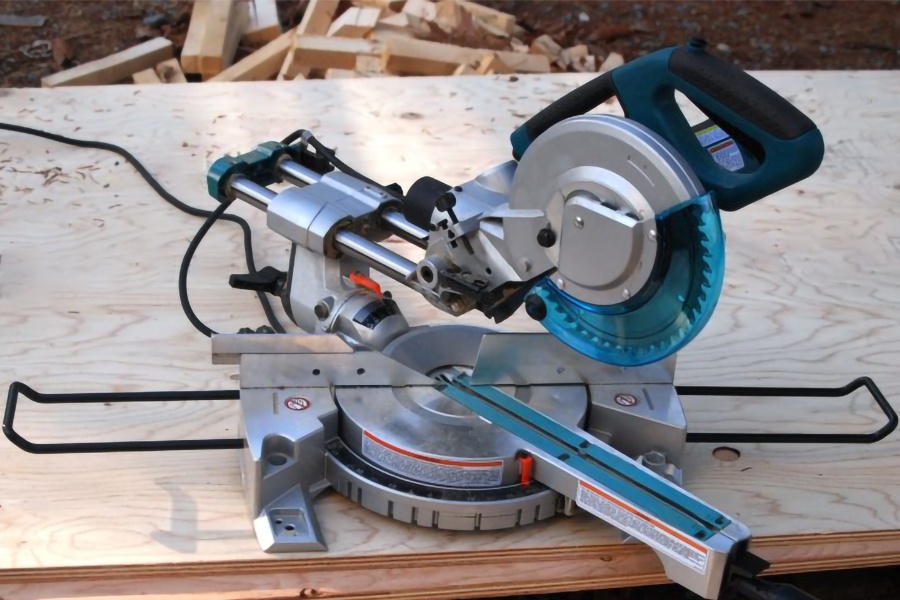
The standard miter saw has a basic design that’s limited in performance as it cannot make a bevel cut. However, it is an excellent tool for crosscuts and miter cuts with accuracy. It is a lightweight tool preferred by DIYers to handsaws for simple tasks.
Compound Miter Saw
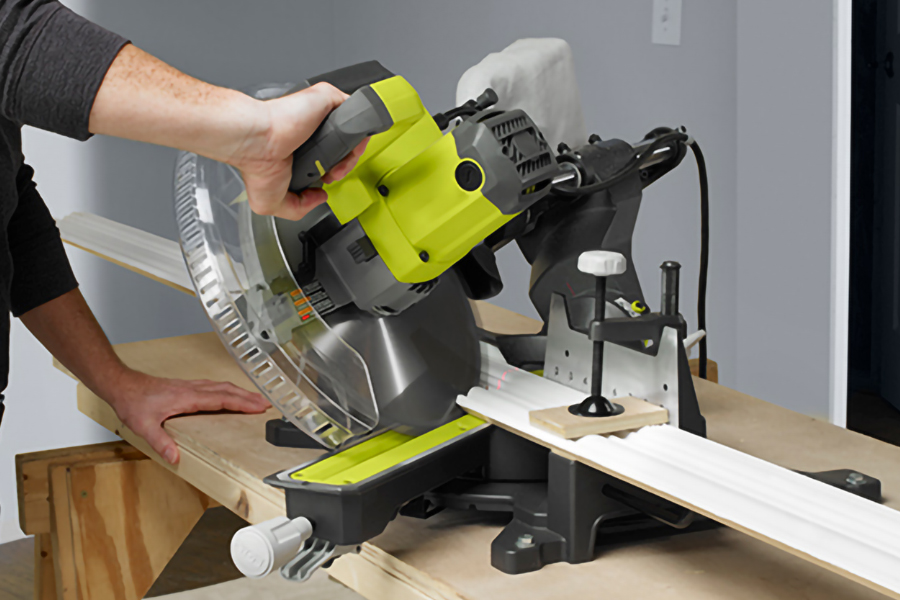
A compound miter saw is equipped to make bevel cuts. It has dual options and can make all kinds of cuts, including a combination of bevel and miter. The best compound miter saw options can cost a small fortune. But they’re ideal for frequent use and bulky materials.
Sliding Compound Miter Saw
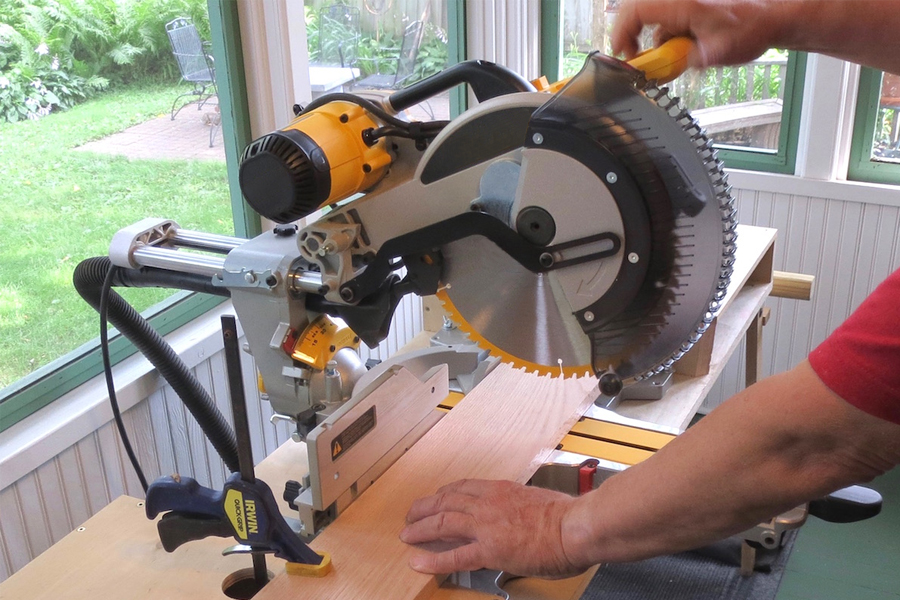
Sliding compound saws are a step up from regular compound miter saws. They can perform the same tasks as a compound miter saw – with the additional feature of a sliding arm. The cutting head can move forward and backward, allowing you to cut large workpieces.
Parts of the Miter Saw
A miter saw is a power tool that has different parts with which you must familiarize yourself. Let’s take a quick glance at these –
- Blade – This is the rotating part of the saw that cuts different materials.
- Blade Guard – It protects users from touching the blade accidentally.
- Trigger Handle – It is the switch to start and stop the blade’s rotation.
- Fence – It is a surface to help you hold the workpiece down at 90 degrees.
- Miter Adjustment Knob – It helps you change the saw blade’s angle.
- Bevel Adjustment Knob – It lets you adjust the saw blade’s tilt.
- Side Arms/Rails – It enables the back-and-forth movement of the saw.
- Dust Bag – This is where the sawdust is collected while cutting.
A miter saw technically doesn’t need a stand, and you can place it on any flat surface or table. But having one can save you from looking for a makeshift stand.
What is a Miter Saw Used For?
A miter saw can be used for making at least two cuts. Some of them are engineered for three types of cuts, too! These include the following –
- Crosscut – It is a straight cut across a workpiece parallel with its edges. It is one of the most basic cuts – and you can simply drop the blade to get it.
- Miter Cut – It is an angled cut across the workpiece’s width or face. It is made with the blade in a vertical position at an angle other than 90 degrees.
- Bevel Cut – It can be achieved by tilting the blade to a horizontal angle between the edge and the surface of the board, which is usually 90 degrees.
A miter saw can help make different cuts in various projects. It is quick and easy to adjust. It also accurately cuts a variety of materials and can also handle lots of work within a short time. You can use this tool to cut small pieces out of a long workpiece.
Miter saws efficiently perform common tasks like crosscuts required in DIY projects. They are majorly used in miter cuts in frames, gates, windows, ledges, etc. Some miter saws make bevel cuts that turn straight edges into decorative trims and crown molding.
Cutting a workpiece into multiple pieces of the same length is easy with the help of this saw. You need to use a stop block for that. To do this, secure the jig to the fence with screws or locking pliers. Hold the material down on the block side and cut it uniformly.
Miter saws are commonly used to cut boards made of wood. But they can also tackle other materials – from wall studs to roofing materials, from pipes to fences. You will need to use specialized blades for these. Therefore, this saw is considered an essential tool for everyone.
How to Use Miter Saw?
Refer to the user manual before setting up a miter saw as model designs may differ from one brand to another. Set up its clamp, laser, lock handle, dust bag, etc. You must also get familiarized with the adjustments, angles, trigger use, safety measures, and more.
Then, you’ll need to calibrate the tool even if it is new. For that, use a combination square to check if the saw’s blade is in a perfect perpendicular position relative to the base and the fence. You can do a test cut on scrap lumber at 90 degrees in the middle.
Flip one of the pieces and place it beside the other to check if the two pieces fit in a straight and flat line. If not, you must adjust the blade to align it. Then, align the laser with the blade by making a test cut – and check the laser’s landing. It may need adjustments.
Mark the Material
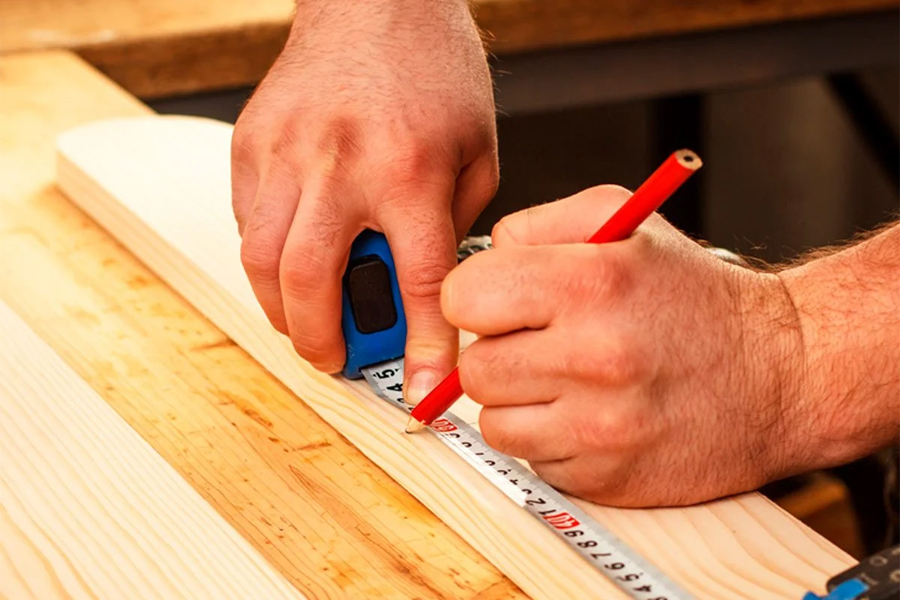
Depending on the width of the blade, measure the cut. If needed, measure it twice. Don’t forget to include the blade’s width. Draw lines on the workpiece using a pencil to mark the material. Then place it against the fence, which is at the saw base’s back.
Make Use of the Clamps
Place the clamp of the saw about 6″ away from the saw blade and make it tighter using its knob to secure it properly. You must use the clamp of the miter saw to protect your hands from severe injuries by keeping your hands away from the rotating saw blade.
Prepare Your Saw
Based on your project, you’ll need to make adjustments to the angle of the saw blade. You can set the angle at 0 degrees or adjust the vertical or horizontal angle. After setting one or both the angles, squeeze the trigger to turn it on and build speed.
How to Use Miter Saw for Miter Cuts?
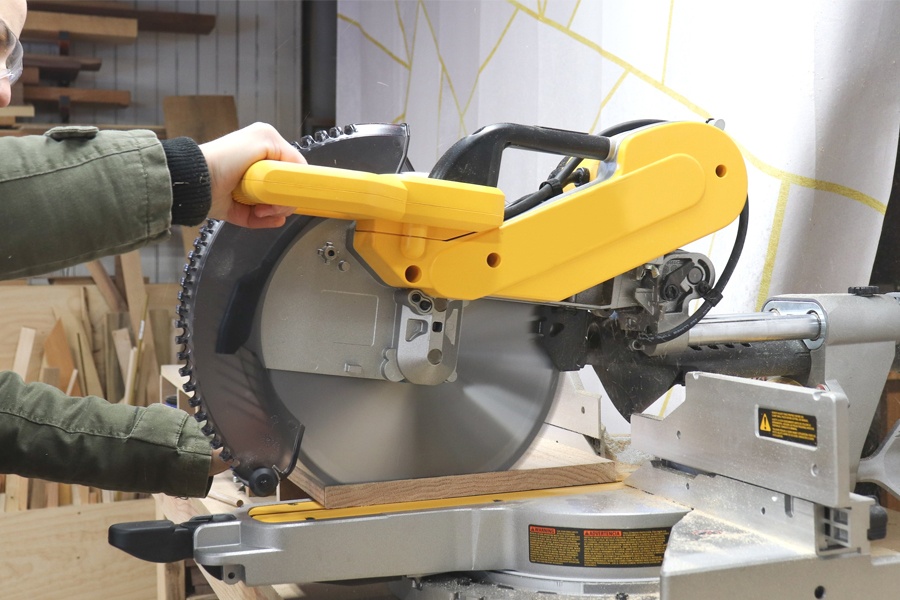
If you want to use the miter saw to make a miter cut, here are the steps to do it:
Setting the Angle
Determine the correct angle with an angle gauge. Consider only half of the reading. If it’s a 90-degree angle, you must set the blade at 45 degrees. Make the adjustment knob loose, set the angle, and tighten the knob.
Workpiece Placement
Unlock the pin at the back to lift the blade. Put the workpiece on the saw and bring the blade down. Adjust the workpiece so that the blade’s inside aligns with the cutline. Use the hold-down clamp to fix the material.
Making the Miter Cut
Squeeze the safety trigger and the trigger to start it. Let the blade rotate for some time and build speed before you lower it to make the cut all the way through. Release the trigger to stop the blade before lifting it.
Cutting the Other Half
Loosen the knob to angle the blade in the opposite direction. Put the workpiece on the saw, aligning it with the blade. Clamp it down and make the cut. Assemble the pieces to check if they form the correct angle.
How to Use Miter Saw for Bevel Cuts?
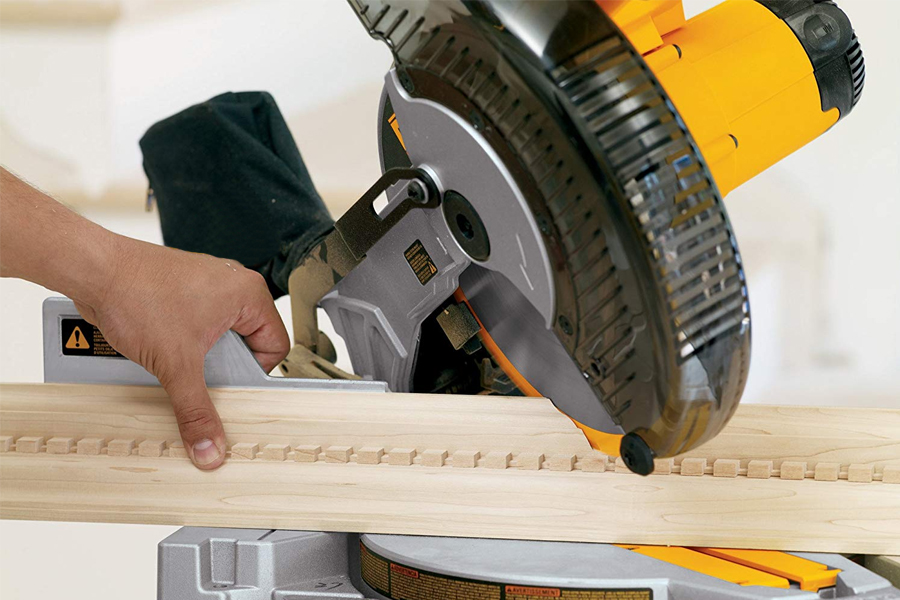
A miter saw can make a bevel cut by using the following steps:
Blade Angle Adjustment
Loosen the knob for bevel adjustments in the back and move the blade. Check the indicator and adjust its angle before tightening the knob. Some saws have a pin that you must pull out to enable blade tilting.
Clearing the Fence
A saw may have removable fence sections that must be removed first. They stay tightened with the help of wing nuts. Remove them without tools or pivot them. Lower the blade to ensure they’re out of the way.
Workpiece Alignment
Put the workpiece in place. Bring the blade lower to check if its lowest tooth lines up with the cutline. It shouldn’t scrape against the material while adjusting. Tighten the hold-down clamp the workpiece to fix it.
Making the Cut
Press the safety trigger of the saw and the trigger. The blade can build speed once it spins for a few seconds. Lower the blade gently and cut the workpiece. Release the trigger to stop the blade before you lift the saw.
Safety and Maintenance Tips
A miter saw is a safe and easy-to-use tool. But it is crucial to maintain the instrument to prolong its life. Plus, you should take certain steps towards safety. Let’s take a look at these individually.
Miter Saw Safety Measures
Your miter saw may come with a manual that talks about safety measures. But it is often a challenge to understand them, especially if you are new to tool talk. So here are a few simple safety measures for you
- Wear safety goggles, ear protectors, and a dust mask before operating the saw.
- Put on gloves when you want to change the blade of the saw.
- Place the blade guard properly for complete safety.
- Move the saw head up and down to check if the blade guard can retract.
- Always keep your hands away from the blade when it moves.
- Maintain a distance of 6″ between your hands and the blade.
- Cut pieces longer than 6″ to prevent your hands from getting close to the blade.
- Keep your hand on the saw’s handle for as long as the blade moves.
- Unplug the tool when you change blades, make adjustments, or stop using it.
- Tighten the blade and attachments properly and regularly.
- Remove gloves, bracelets, long accessories, or loose clothing. Tie up long hair.
- Only use blades of the recommended size.
- Make sure that the washers and fasteners are in the right position.
- Do not try freehanded cutting.
- Check the power cord regularly to ensure it isn’t worn or frayed.
- Tighten all loose nuts and bolts regularly to prevent accidents.
Miter Saw Maintenance Tips
It is a good idea to put extra effort into cleaning and maintaining a miter saw. Doing so will ensure that the saw keeps performing well for a long time and does not develop problems. Here’s what you need to do.
- Make sure to clean the work area and remove all sawdust.
- Always clean out the dust bag after every use.
- You can wipe the table and fence areas with a sponge to clean off the buildup.
- Clean the blade and remove the pitch using tar remover.
- Use a vacuum cleaner to remove dust from the fins and the spot under the arm.
- Don’t over-tighten the arbor while changing the blade.
- Choose a mild surface cleaner that is suitable for metal.
- Get a blade sharpener to detail the methods if the blade becomes dull.
- Apply oil to the blade and use a metal brush to remove debris.
- Lubricate parts that seem to have become stiff.
Conclusion
Whether you are a DIYer who enjoys small crafts – or have a fully-operating workshop, a miter saw can be a great asset. It can help you achieve a wide range of cuts with great accuracy. And with a little bit of practice, you can learn how to use a miter saw easily.
Frequently Asked Questions
Is Using a Miter Saw Easy?
Using a miter saw needs a bit of practice – But that’s true for all tools. The best part is that learning how to use a miter saw is quite easy due to the stability and safety it provides. It will allow you to make repeated crosscuts and angled cuts quite easily.
Can a Miter Saw be Used Like a Table Saw?
A miter saw is not a good substitute for a table saw because the functions of the two tools are quite dissimilar. Unlike table saws, miter saws are not for ripping long and narrow boards or sheets, and they can’t make many cuts that table saws can, like cove and dado.
Do I Really need a Miter Saw?
A miter saw can be a valuable addition to the workshop for a beginner or an advanced user. It is an excellent power tool for cutting moldings, rafters, straight cuts, and more. You can use it for photo frames, window casings, door frames, etc. It is known for its incredible precision.
What Does Dual-Bevel mean on a Miter Saw?
You may come across a tool that is described as a dual-bevel compound miter saw. It means that the angle or “bevel” of the miter saw’s blade can be adjusted to the right and the left. Because of this blade movement, the tool is also referred to as a double bevel miter saw.
Is a Miter Saw Good for Beginners?
A miter saw is an excellent tool for beginners and DIYers. Almost all projects by newbies and amateurs can be handled by the miter saw alone. That’s because it is excellent at making repeated crosscuts at 90 degrees and angled cuts of 0-45 degrees. Plus, it’s stable and secure.

Leave a Reply